The Preview app on your Mac is a suitable enough option to get things done and it comes pre-loaded in macOS. We will show you how to remove image background on Mac using Preview.
What Is the Preview App
Whenever you open an image on your Mac, you’ll need a photo viewer to check the images. Unlike Windows, which has a straightforward Photos app name, the macOS tries to keep it a bit different. Whenever you click on an image icon, it’ll open the Preview app.
Besides being a photo viewer, the Preview app also packs enough image editing features to get you by. One such feature is that it lets you remove background from a picture. No need to worry because the process is quite simple, and you don’t have to go through hoops for it.
Remove Background From Image For macOS Ventura and Later
With the release of macOS Ventura, Apple adds a default option to easily remove background in the Preview app. While the method is straightforward, you’ll need to run macOS Ventura or higher on your Mac. Here’s how to remove background from a picture using Preview. Step 1: Open the image in the Preview app. Step 2: Click on Tools in the top Menu Bar.
Step 3: Click on Remove Background from the list of options. Or you can press Shift + Command + K shortcut on your Mac.
Step 4: If you’re using a JPG image, Preview app will require to convert it to a PNG. Click on Convert to confirm your choice.
Step 5: Press Command + S to save the image on your Mac. That’s the quickest way to remove the background from a photo on your Mac.
Remove Background From Image in Preview Using Instant Alpha
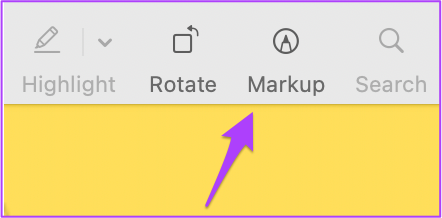
For Macs running macOS Monterey or earlier, you can use a feature called Instant Alpha in the Preview app. The Instant Alpha feature of the Preview app lets you edit the image albeit with manual selection options. Follow these steps to do the same. Step 1: Double-click on an image to open it in Preview on your Mac. Step 2: Click on the Markup Toolbar icon at the top-right corner.
You will see the toolbar with a few options. Step 3: From the toolbar options, select Instant Alpha.
After selecting the option, your mouse pointer will now look like a Plus sign. Step 4: Click on the empty area and drag the pointer to select the background of your image.
You have to be careful while selecting the background and omitting your subject. Step 5: Release the pointer after selecting the required area of the background.
The snake lines around the subject will indicate that it has been selected to separate from the background. Step 6: Press Delete on your keyboard to remove the background.
Step 7: Click on File and select Save. This is how you can use the Instant Alpha tool to remove an image’s background. Please remember that this feature won’t work for photos having low contrast between the background and subject. You might have an image whose background removal could get tricky. There might be too many contents in the image which might not solve the purpose just by using Instant Alpha. The good news is that you can customize the selection of Instant Alpha as per your image. Here are three different types of selections to choose from.
- Instant Alpha using Elliptical and Rectangle Selection You choose any of the two selections depending on the shape of your subject. Follow these steps to use either of those tools. Step 1: After selecting Show Markup Toolbar, click on the Selection icon at the extreme left.
Step 2: Select Rectangular Selection or Elliptical Selection depending on the shape of your subject.
Step 3: Click and drag to select the area you wish to crop.
Step 4: Press command + X to delete the selected portion from the background.
Step 5: If you are prompted to convert JPG to PNG, choose Convert.
Step 6: Press command/Cmd + A to select the remaining background and hit Delete.
You will see that both the selection portion and image background have been removed. Step 7: To bring back the select portion, press command + V.
Step 8: Click on File and select Save. 2. Instant Alpha using Lasso Selection. The Lasso selection will help you to take care of the finer details. Using this tool, you can form any shape and remove the object or subject from the background. This tool is helpful for images like you holding ice cream or a plate of your favorite dish. In such cases, the Lasso Selection tool will help you maintain your subject’s specifics shape. Follow these steps to use this tool. Step 1: Click on the Selection icon and select Lasso Selection from the menu.
Step 2: Drag the mouse pointer and draw the selection around the borders of your subject. Make sure you join the snake line with the point from where you started the selection. Step 3: Release the mouse pointer to see your select area.
Step 4: Press Cmd + X to remove the selection.
Step 5: Press Cmd + A to select the remaining background and hit Delete.
Step 6: To bring back the select portion, press Cmd + V.
Step 7: Press Cmd + S to save the file. 3. Instant Alpha using Smart Lasso Selection Last but not least, you can choose Smart Lasso Selection. It is a combination of all the selection tools with the power of Instant Alpha. If you find the selection above tools slightly cumbersome, you can use Smart Lasso Selection to isolate your subject in a better way. Follow these steps. Step 1: Click on the Selection icon and select Smart Lasso.
Step 2: Click and hold to drag the outline of an area close to your subject’s border.
Step 3: Release the pointer to view your selection.
Step 4: Press Delete to remove the selection.
Step 5: Keep repeating this process until you completely remove the image background. Step 6: Save your file.
Remove Image Background Easily
These were the different ways to remove image background on Mac using Preview. You can choose any Selection Tool for removing the background. It depends on how isolated or occupied your subject is in the image. The above article may contain affiliate links which help support Guiding Tech. However, it does not affect our editorial integrity. The content remains unbiased and authentic.


