Thankfully, there are a handful of solutions to help you get past the error on your iPhone. So, let’s check them out.
1. Sign Out and Sign In Again
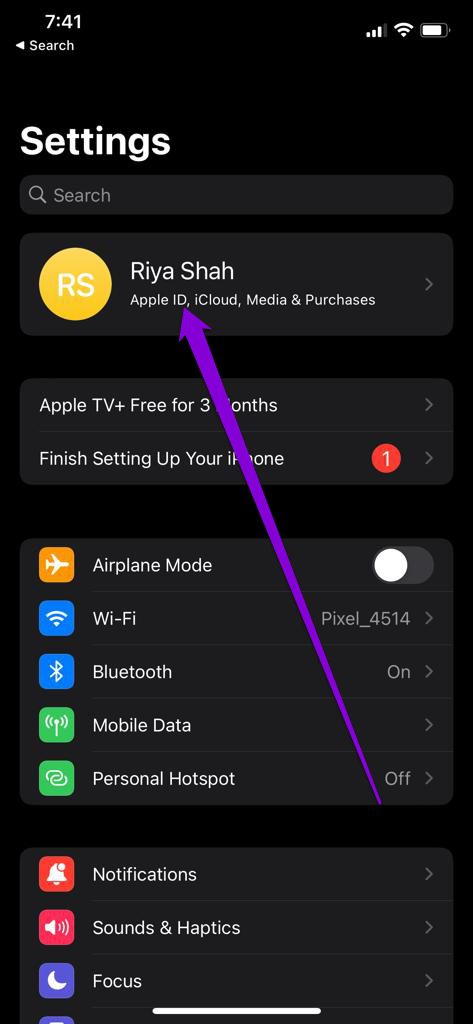
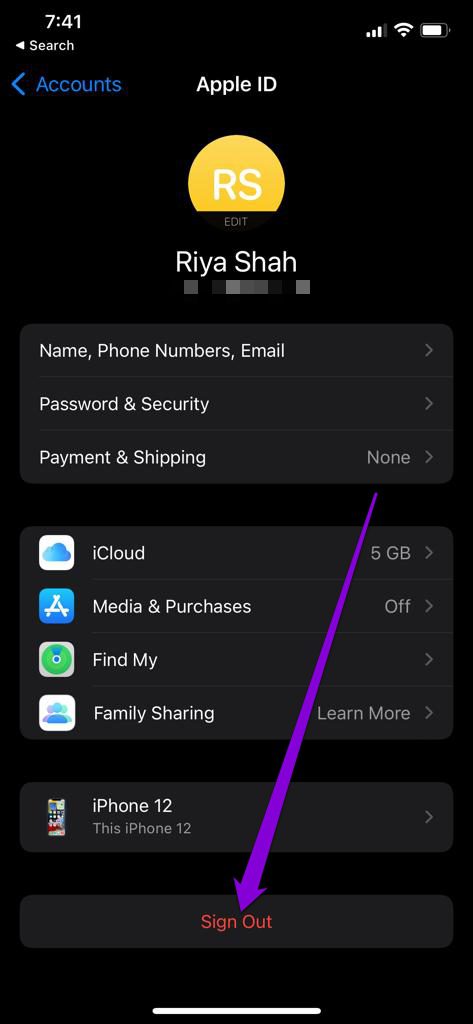
Since the error indicates a failure to connect to the server, you can start by signing out of your Apple ID and signing back in. The idea is to establish a fresh connection for your iPhone with the Apple servers. Step 1: Launch the Settings app on your iPhone and tap on your name at the top. From the next screen, scroll down and tap on the Sign Out option.
Step 2: Enter your Apple ID password and tap on Turn Off.
Sign back in with your Apple ID and password to see if the error occurs again.
2. Check the Apple System Status Page
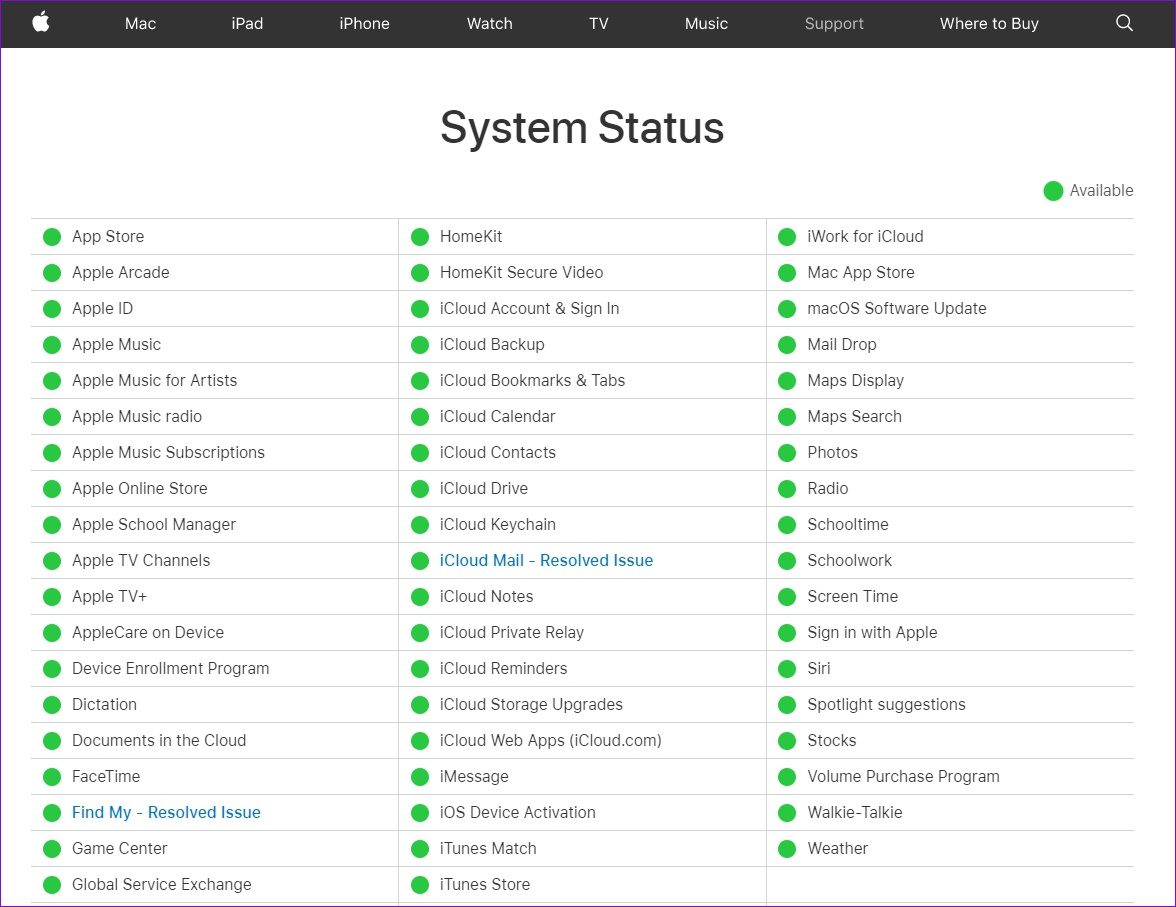
At times, Apple’s services might be down for maintenance or temporary outage. Visit the Apple’s System Status page to check if the Apple servers are working fine. On the System Status page, check to see if there is a service outage.
3. Correct Date & Time on iPhone
Apple servers rely on the date and time set on your phone to verify and sync data. If your iPhone is set to an incorrect date or time, then it may fail to connect to the Apple ID server. The best practice is to let iPhone use network-provided time. Here’s how. Step 1: Launch the Settings app on your iPhone and navigate to General.
Step 2: Tap on Date & Time. Toggle on the switch next to Set Automatically.
4. Change Your Apple ID Password
If your iPhone is still failing to connect to the Apple ID server, then you can try changing your Apple ID password. While your password might be too easy to guess, it always helps to set a stronger password. Step 1: Open up the Settings app on your iPhone. Tap on your name at the top.
Step 2: Go to Password & Security and tap on Change Password.
Step 3: Set a new password for your Apple ID by entering it twice. Then tap on Change.
After this, restart your iPhone and see if the error pops up again.
5. Use Verification Code
If the error is only occurring as you try to sign in to your Apple ID account, you can generate a verification code on one of your other Apple devices and use that to sign in. To generate a verification code on iPhone, follow the steps below. Step 1: Open the Settings app and tap on your name at the top.
Step 2: Go to Password & Security and scroll down to tap on ‘Get Verification Code.’
Similarly, to generate a verification code on Mac, follow the steps below. Step 1: Click on the Apple logo on the menu bar in the top-right corner and select System Preferences.
Step 2: In the System Preferences window, click on your Apple ID at the top. Navigate to the Password & Security tab and click on Get Verification Code button.
After that, use the verification code to sign in.
6. Reset Network Settings
Your iPhone may be struggling to connect to Apple ID due to a network error. To fix this, you can try resetting the network settings on your iPhone. Step 1: Open up Settings app on your iPhone and go to General. Tap on Transfer or Reset iPhone.
Step 2: Tap on the Reset option at the bottom and choose Reset Network Settings from the resulting menu.
Step 3: Enter your lock screen password to verify your identity and tap on the Reset Network Settings again when prompted.
7. Update iOS
Next, you can check your iPhone for any pending software updates. If the issue is related to the current iOS version you’re on, then updating it will resolve it for good. To check for updates on iPhone, open the Settings app and go to General. Then, tap on Software Update.
Download and install any pending updates. After iPhone reboots, check if it can connect to the Apple ID server.
8. Avoid Using VPN
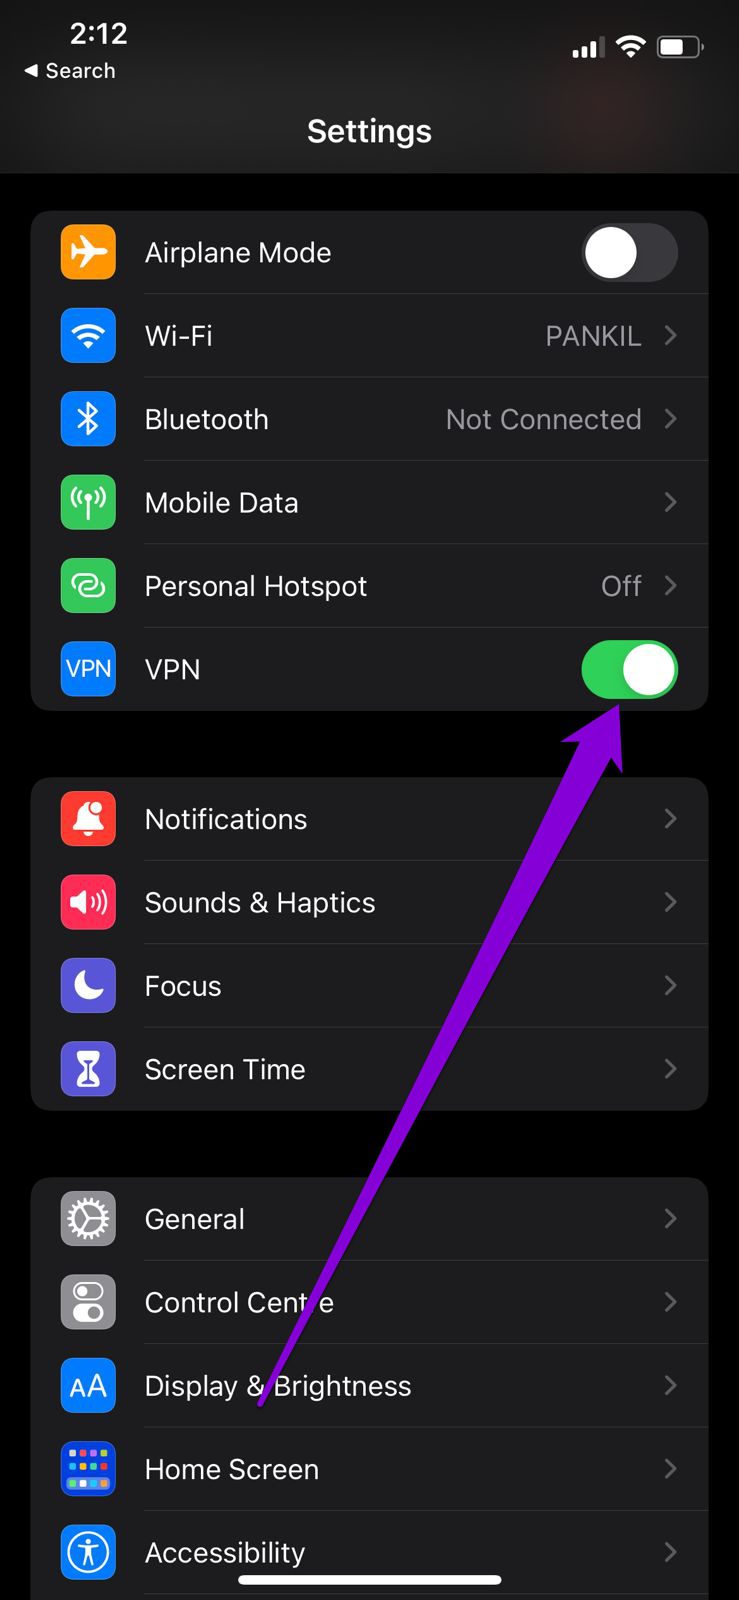
Lastly, using a VPN connection on your iPhone can also result in connectivity issues. Hence, it’s best to turn it off, if your iPhone is fails to connect to the Apple ID server. To disable VPN, open the Settings app and turn off the slider next to VPN.
Connected Again
In most cases, you’ll be able to resolve it by singing in again or updating the date and time. Let us know which of the above solutions fixed the error in the comments below. The above article may contain affiliate links which help support Guiding Tech. However, it does not affect our editorial integrity. The content remains unbiased and authentic.
